
TL;DR
A closet rig is about reducing reflections and echo through strategic placement and absorption, not just adding foam. The real game-changer is controlling noise transmission and heat with smart setup and ventilation.
Imagine turning that tiny, cluttered closet into a quiet, professional-quality vocal booth. It’s easier than you think. The secret isn’t just foam and blankets; it’s about where you put them and how you control noise transfer and heat. For more on acoustic setup, see Acoustic Dampening, Placement, and the “Rig in the Closet” Setup.
Whether you’re podcasting, recording vocals, or doing voice-over work, your goal is clear: create a space that sounds good without breaking the bank. This guide breaks down the best ways to dampen sound, place your mic, and keep your closet cool and quiet—all with simple tricks and real-world examples.
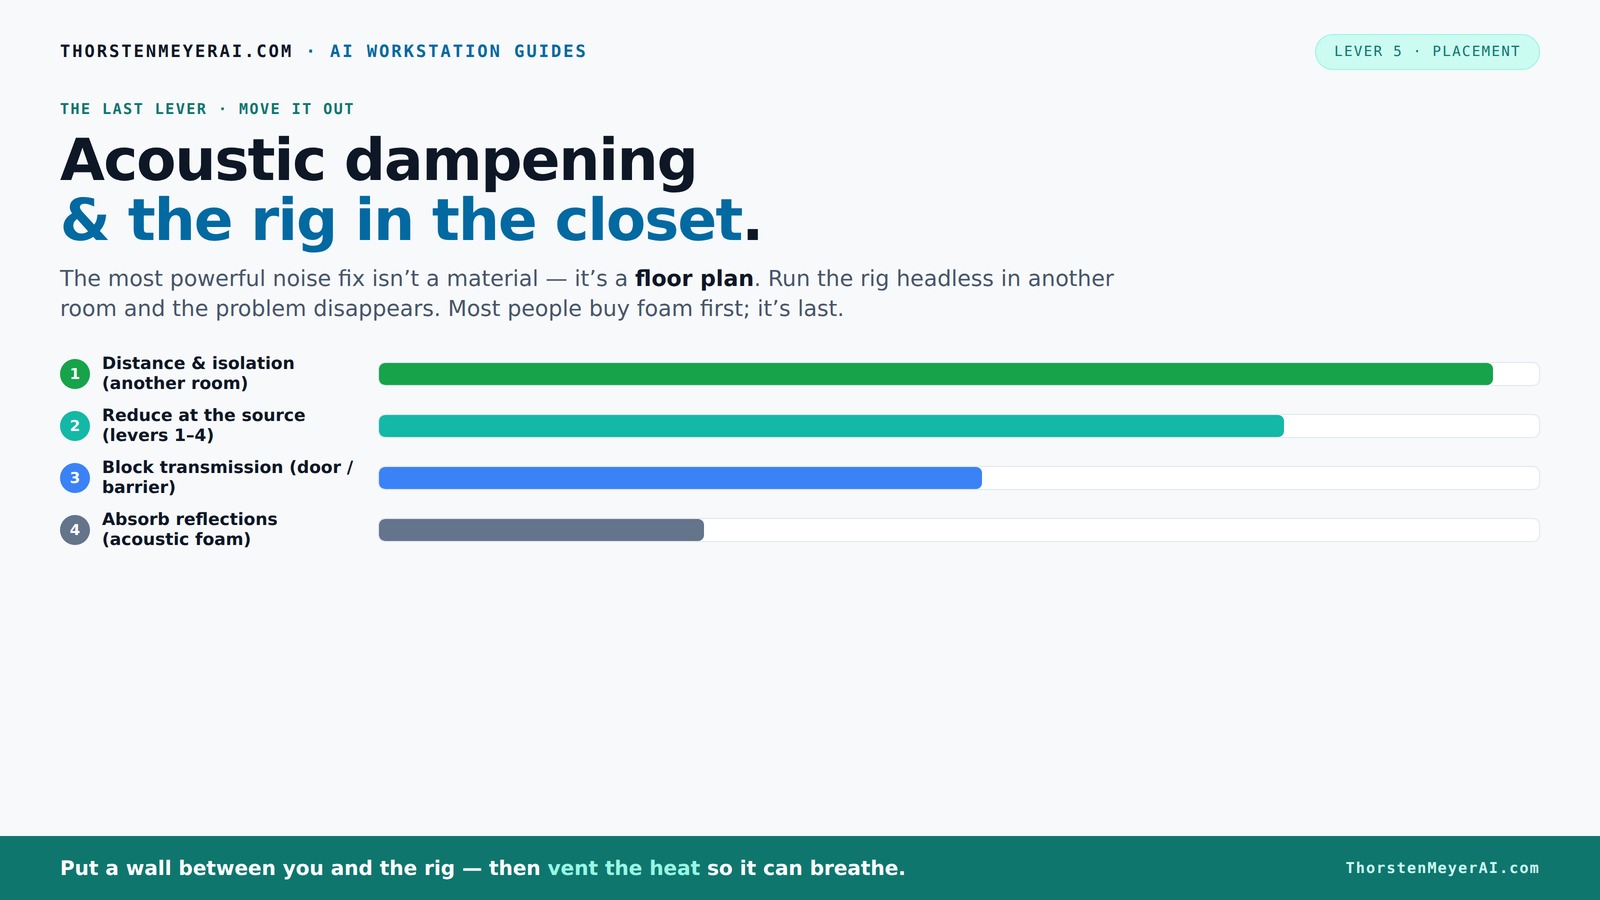
Acoustic dampening
& the rig in the closet.
The most powerful noise fix isn’t a material — it’s a floor plan. A rig you can’t hear because it’s in another room beats any amount of foam. Tap the approaches in Part 1 to see what actually works.
(another room)
(levers 1–4)
(door / barrier)
(acoustic foam)
Contain the noise, not the heat
Key Takeaways
- Distance and physical barriers are the most effective soundproofing tools, often more so than foam or blankets.
- Proper ventilation is critical when placing high-power rigs in enclosed spaces like closets to prevent overheating.
- Treat the first reflection points—walls behind and beside the mic—for the clearest recordings.
- Seal gaps around doors and vents to block sound leaks, but don’t forget to manage heat.
- Affordable materials like blankets, rugs, and foam panels can do a surprising amount of work when placed strategically.
Saiqiang Acoustic Foam Panels Sound Absorbing 12 Pack - 1" X 12"X 12" Sound Proof Panels Noise Reducing for Walls, High Density Sound Deadening Panels Black Wedge for Studio Recording & Office & Home
Professional Sound Absorption for Studios and Podcast Spaces - High-density acoustic foam panels and sound absorbing panels are...
As an affiliate, we earn on qualifying purchases.
As an affiliate, we earn on qualifying purchases.
Why Noise Reduction Is About Distance, Not Just Foam
Most people think slapping foam on the walls will make their closet soundproof. Not quite. Acoustic foam absorbs echoes inside the space but doesn’t block sound from escaping. The real hero is distance and isolation. Moving your rig into another room or closet creates a barrier that foam can’t match.
For example, if your GPU rig roars in the next room, you won’t hear it. But if it’s on your desk, every fan hum echoes around. So, the first step is to get your equipment as far away as possible and use physical barriers—doors, walls, or even a closet with a door—to keep noise from traveling.
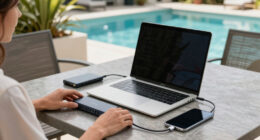
This is why many creators put their rigs in a separate room, then connect via network. You get the power without the noise. The big takeaway: the best soundproofing is simply not having the rig in your immediate space.

8 Pack - Bass Traps Acoustic Foam Corner, 8''x8''x12'' Black Bass Traps Corner Studio Foam, High Density and Fire-Proof Acoustic Panels Recording Studio Acoustical Treatments
Acoustic Principle- Bass Trap is a kind of sound absorbing structure specially used to absorb specific low-frequency standing...
As an affiliate, we earn on qualifying purchases.
As an affiliate, we earn on qualifying purchases.
The 'Rig in the Closet' — How to Make It Work Without Cooking Your Gear
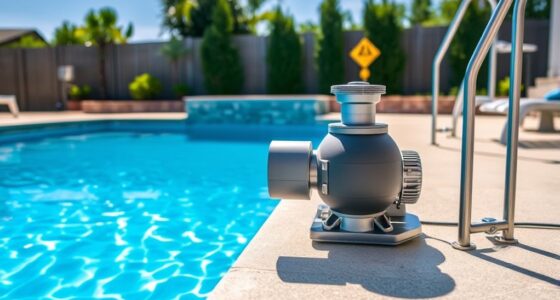
Placing a high-power rig inside a closet sounds perfect for noise control. But it’s a balancing act. A sealed closet traps heat, turning your space into a sauna for your machine. That heat buildup can throttle performance or even damage components over time.
To keep your rig cool, you need airflow. Think of it like a car engine—hot air needs an escape route. Use passive vents, or better yet, a quiet exhaust fan that pulls hot air out and brings in cooler air. This way, your rig stays cool, and the noise stays contained.
Serious setups even use soundproof cabinets with built-in cooling systems—these combine foam lining with temperature-controlled airflow, balancing quiet and heat dissipation effectively. For more on cooling options, check out this guide to reducing heat and noise in your AI workstation.

Dmsky Microphone Isolation Shield with Pop Filter & Tripod Stand, Foldable Mic Shield with Triple Sound Insulation, High Density Mic Sound Shield for Recording Studio, Podcasts, Singing, Broadcasting
【Excellent noise reduction】Triple Sound Insulation,foldable Microphone Isolation with reflective layer+filter layer+absorbing layer.the high-density acoustic foam that eliminates audio...
As an affiliate, we earn on qualifying purchases.
As an affiliate, we earn on qualifying purchases.
Acoustic Dampening vs. Soundproofing — What’s the Real Deal?
Acoustic dampening and soundproofing are two sides of the same coin, but they serve different purposes. Dampening materials like foam panels, blankets, and rugs soak up sound reflections inside your closet, making recordings clearer and reducing echo. These materials are crucial because they directly affect the quality of your recordings by controlling how sound behaves within the space. Without proper dampening, even the best microphone will pick up unwanted echoes, making your recordings sound muddy or distant.
Soundproofing, on the other hand, involves sealing gaps, adding mass to walls, and blocking sound from escaping. Think of it like putting a heavy curtain over a window versus hanging a thick blanket inside the room. While dampening improves sound quality within the room, soundproofing prevents external noise from leaking in and your sound from disturbing others. Both are vital for a professional setup, but understanding their distinct roles helps you prioritize and balance your efforts based on your specific needs. For example, if noise from outside the closet is a problem, focus on sealing gaps and adding mass. If echo and reflections are your main concern, prioritize dampening materials.

Ultimate Portable Vocal Booth for Home Recording, Reduces Echo & Reverb
The Original & Best Portable Vocal Booth — Snap Studio created the category. Pop-up recording space for singers,...
As an affiliate, we earn on qualifying purchases.
As an affiliate, we earn on qualifying purchases.
Best Mic and Treatment Placement for a Closet Booth
Where you place your mic and acoustic treatments can make or break your sound. Start by positioning the mic about 6-12 inches from your mouth, angled slightly to avoid reflections from nearby walls. But the real key is what’s behind and around it.
In a closet, treat the wall behind the mic first—adding acoustic panels or a reflection filter helps reduce room echo. Place foam or blankets on the side walls and ceiling, especially near hard surfaces that bounce sound back into the mic. For more on treatment placement, see treatment placement tips.
Here’s a quick setup tip: hang a blanket behind the mic and add foam panels on the side walls. Use a rug on the floor to cut down on reflections coming from below. This creates a focused, clear recording environment.
Deeply considering placement improves the clarity of your recordings because it minimizes unwanted reflections and reverberations. The closer the mic is to your mouth and the better the treatment around it, the less room sound gets picked up, resulting in cleaner, more professional recordings. For more on microphone placement, visit Delvaste.
How to Seal and Stop Sound Leaks in a Closet
Gaps around doors, vents, and outlets are the sneaky culprits of sound leaks. Sealing these is often the simplest way to improve your closet’s soundproofing. Use weatherstripping around the door frame, seal cracks with acoustic sealant, and cover vents with soundproof blankets or foam. Learn more about acoustic dampening and sealing techniques.
For example, a typical closet door might leak noise through tiny gaps. Adding a thick blanket or a door sweep can cut sound transmission significantly. If you want to go all-in, install a solid core door and seal every crack.
Remember: even small gaps can let a lot of sound escape or enter. The goal is to make the space as airtight as possible without trapping heat or moisture. This requires careful inspection—listen for leaks by gently speaking near them or using a flashlight at night to spot light shining through gaps. Sealing these effectively prevents external noise from infiltrating and your sound from escaping, which is essential for a truly controlled environment.
Budget-Friendly Materials for Your Closet Soundproofing Arsenal
You don’t need a fortune to improve your closet’s sound. Basic acoustic panels from Amazon, blankets, and rugs can dramatically reduce reflections and echo. For example, hanging moving blankets over the door and lining the walls with foam panels can cut echo by 60-70%. For more tips on budget-friendly soundproofing, visit Unique Gifts and Decor.
Rugs and carpets on the floor absorb bouncing sound and prevent low-end buildup. Bass traps in corners are a bonus for controlling low frequencies, but even thick curtains can help tame boomy sounds. The key is strategic placement—cover the most reflective surfaces first, then add layers as needed to balance absorption and ventilation.
Check out [this list of affordable soundproofing gear](https://www.amazon.com/dp/?tag=dreamridiculo-20) for ideas. The key is placement—what you put where matters more than what you buy. Combining these materials thoughtfully can create a surprisingly effective environment without breaking the bank.
Common Mistakes That Sabotage Your Closet Sound Setup
One common mistake is overloading the space with foam without considering placement. Foam panels placed far from the mic won’t do much. Instead, focus on treating the first reflection points—walls directly behind and beside the mic. This targeted approach ensures that your treatments are effective where they matter most, improving clarity and reducing echo.
Another is sealing gaps and ignoring heat management. A sealed closet traps heat, throttling your gear and causing fans to roar louder. Always ensure proper ventilation, which is crucial to prevent overheating and maintain consistent performance. Without proper airflow, heat buildup can lead to thermal throttling, reducing your gear’s efficiency and lifespan.
Finally, assuming that thicker foam or more panels always equals better sound—sometimes, less is more if you treat the right spots. A cluttered, poorly treated closet can sound worse than a simple, well-placed setup. Focus on strategic placement rather than quantity, and regularly evaluate your setup to find the optimal balance between sound quality and heat management.
Frequently Asked Questions
Do I need soundproofing or just acoustic treatment?
It depends on your goal. Acoustic treatment reduces echo and reflections inside your space, making recordings clearer. Soundproofing blocks sound from escaping or entering. For most closet setups, a combination works best—treat the room and seal gaps.Where should I place the microphone in a closet booth?
Position the mic about 6-12 inches from your mouth, angled slightly away from reflective surfaces. Treat the wall behind the mic first with foam or a reflection filter. Keep the mic away from hard surfaces to minimize unwanted reflections.Which walls should get panels first?
Start with the wall directly behind the mic, then treat the side walls and ceiling. Focus on surfaces where sound bounces back into the mic. Use a mirror trick—place a mirror on the wall and find the points where reflections come from.How thick should acoustic panels be for a small closet?
Panels 2 to 4 inches thick are usually enough for small spaces. Thicker panels absorb lower frequencies better, but even 2-inch foam can significantly reduce echo when placed correctly.Will blankets or foam work better?
Blankets are quick, low-cost solutions for blocking sound leaks and absorbing reflections. Foam panels are more durable and suited for targeted reflection points. Use blankets on doors and low-cost panels on walls for best results.Conclusion
Turning your closet into a quiet, effective recording space isn’t about buying the most expensive foam. It’s about smart placement, sealing leaks, and managing heat. Think of it as crafting a miniature, controlled environment where sound is contained, not just absorbed.
Remember: the best setup is one that balances sound dampening with proper ventilation. Your closet can be a surprisingly good studio—just treat it like one. So, go ahead, give those gaps a seal, move the gear away, and start creating in peace.