To waterproof your pool light niche and prevent leaks, start by thoroughly cleaning the area and replacing any worn gaskets. Apply a high-quality sealant like silicone or polyurethane evenly around the penetration, ensuring there are no gaps or air bubbles. Smooth out the sealant and let it cure fully before filling your pool slightly above the niche to check for leaks. Keep in mind, proper technique and materials are key—continue exploring for detailed steps to ensure a leak-free seal.
Key Takeaways
- Thoroughly clean and dry the niche surface before applying a high-quality, waterproof sealant compatible with pool environments.
- Repair any cracks or damage in the niche prior to sealing to ensure a solid, leak-proof foundation.
- Apply sealant evenly around the entire perimeter of the penetration using a caulking gun, smoothing for complete coverage.
- Test the waterproof seal by filling the pool slightly above the niche and monitoring for at least 30 minutes for leaks.
- Regularly inspect and reapply sealant or replace gaskets as needed to maintain a secure, long-lasting waterproof seal.

2-Pack Boss 802 Clear Pro Grade Silicone Sealant for Pool, spa, Household – 2 x 280ML. Tubes
High-Quality Silicone Sealant: Seal and protect your pool, spa, and household surfaces with this professional-grade silicone sealant from…
As an affiliate, we earn on qualifying purchases.
As an affiliate, we earn on qualifying purchases.
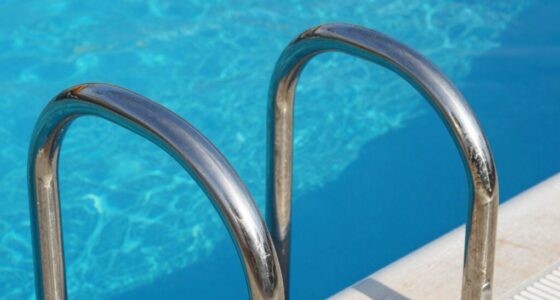
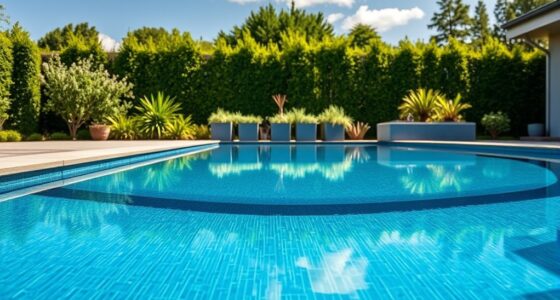
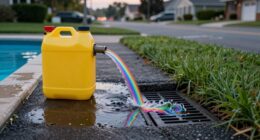
Why Pool Light Niches Are Prone to Leaks and the Risks They Bring
Pool light niches are particularly vulnerable to leaks because their seals and fittings can degrade over time. When these components weaken, water can seep into the niche, risking damage to your pool’s structure and increasing maintenance costs. Leaks compromise pool safety by creating slippery surfaces and potential electrical hazards if water reaches wiring. Additionally, they reduce energy efficiency, as leaks can cause pump and filter systems to work harder, wasting energy and increasing utility bills. Over time, exposure to chlorinated water and weather elements accelerates seal deterioration. Addressing these vulnerabilities early helps prevent costly repairs and ensures your pool remains a safe, energy-efficient oasis. Regular inspections and timely resealing are key to maintaining the integrity of your pool light niche. Proper projector technology and maintenance practices can extend the lifespan of these components and keep your pool safe and functional. Implementing proper sealing techniques can further enhance waterproofing and prevent future leaks. Using high-quality sealants and advanced waterproofing methods can provide extra protection against water intrusion over the long term. Additionally, using specialized sealants that resist chlorinated water can significantly improve durability and longevity.
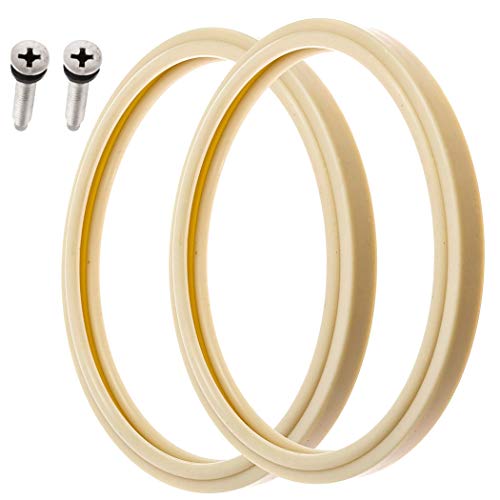
(1 Set) 8 3/8" Pool Light Lens Gasket and Stainless Pilot Screw – Exact Replacements for Pentair 79101600Z and 79104800 – Compatible with Pentair IntelliBrite, AmerLite, and SAM Amerlite Lights
8 3/8" POOL LIGHT LENS GASKET AND STAINLESS PILOT SCREW – Keep pool water out of your pool…
As an affiliate, we earn on qualifying purchases.
As an affiliate, we earn on qualifying purchases.
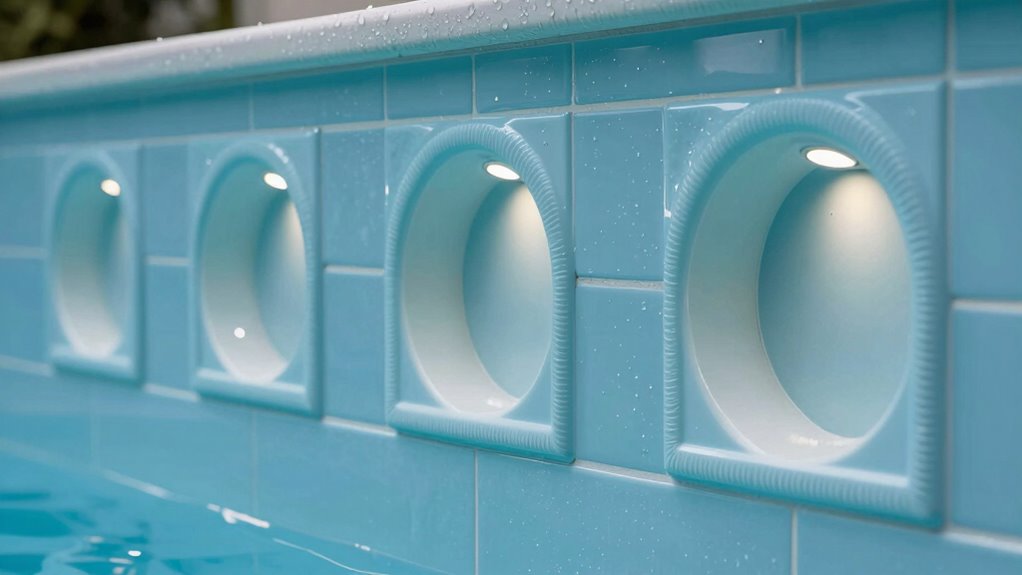
How Do I Check My Pool Light Niche for Leaks and Damage?
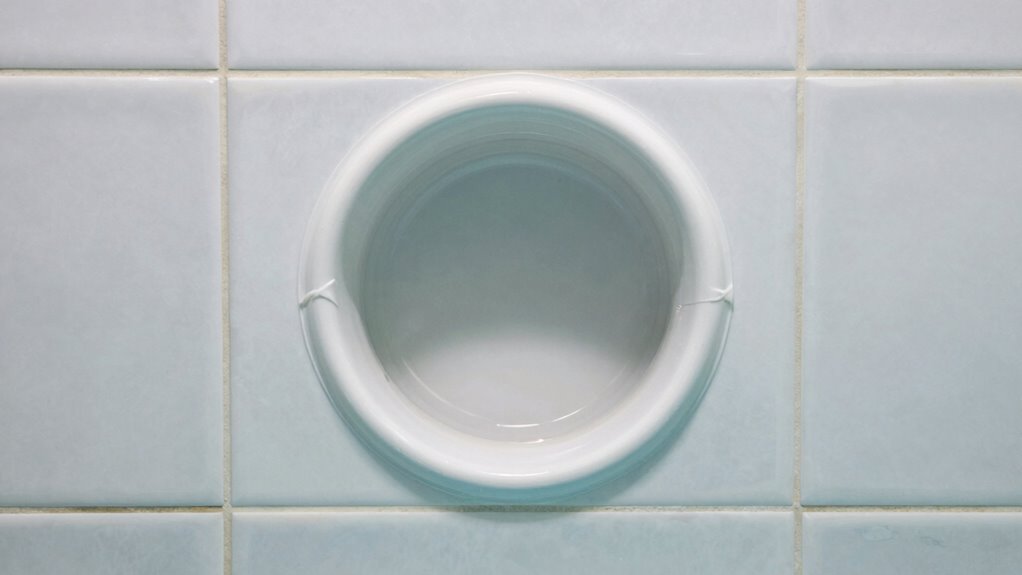
To check your pool light niche for leaks and damage, start with a thorough visual inspection, looking for cracks, corrosion, or loose fittings. Keep an eye out for signs of water intrusion, such as discoloration, mold, or damp spots around the niche. Addressing these early can prevent more costly repairs down the line. Regular maintenance and understanding pool light history can help identify potential issues before they become severe. Additionally, inspecting the waterproofing materials used around the niche can reveal whether protective layers are still effective or need replacement.
Visual Inspection Techniques
Performing a visual inspection of your pool light niche is a straightforward way to spot potential issues before they worsen. Start with a thorough structural assessment to identify cracks, chips, or signs of deterioration. Look for any discoloration or corrosion around the niche, which can indicate leaks. Check the area around the light for water stains or mineral deposits, suggesting water intrusion. To help visualize, consider these key points:
- Examine the niche’s edge for cracks or gaps.
- Inspect the sealing gasket for wear or damage.
- Look at the surrounding wall for discoloration or efflorescence.
- Review the content formats used in your inspection process to ensure comprehensive coverage. Incorporating proper inspection techniques can enhance early detection of issues. In addition, paying attention to pool maintenance practices can help prevent early signs of damage and prolong the life of your pool light niche. Regularly performing visual inspections is also crucial to maintaining overall pool safety and performance. Additionally, staying vigilant about water chemistry can help identify corrosion or deterioration early on.
Signs of Water Intrusion
Water intrusion often leaves visible signs that can alert you to leaks in your pool light niche. Look for water stains, discoloration, or mold around the niche area, as these are common indicators of water intrusion. You might notice water collecting behind the light lens or dripping from the niche. Cracks or corrosion on the niche’s surface can also signal damage that allows water to seep in. During routine leak detection, pay attention to any dampness or moisture buildup inside the niche or around the light fixture. Unexplained increases in your pool’s water level can also suggest a leak. Regularly inspecting these signs helps you catch issues early, preventing more significant damage and ensuring your pool’s light system remains watertight. Incorporating proper maintenance practices can further extend the lifespan of your pool light niche and prevent future leaks. Additionally, understanding waterproofing techniques can help protect the niche from future water intrusion. Performing periodic visual inspections and testing can help identify potential issues before they develop into costly repairs.

Newborn 930-GTD Drip-Free Smooth Hex Rod Cradle Caulking Gun with Gator Trigger Comfort Grip, 1/10 Gallon Cartridge, 10:1 Thrust Ratio
PRECISION CAULKING WITH DRIP-FREE TECHNOLOGY: The Octogun 930-GTD Caulking Gun by Newborn offers advanced drip-free technology, providing smooth,…
As an affiliate, we earn on qualifying purchases.
As an affiliate, we earn on qualifying purchases.
What Materials and Sealants Are Best for Waterproofing Pool Light Niches?
Choosing the right materials and sealants is essential for effectively waterproofing your pool light niches. Proper selection guarantees a secure, leak-free installation that lasts. For pool light installation, consider sealants that resist water, chlorine, and UV exposure. Three top options include:
Selecting the right waterproof sealants ensures a secure, leak-free pool light installation that lasts.
- Silicone Sealant – Flexible, durable, and waterproof, perfect for sealing around the niche and wiring.
- Polyurethane Sealant – Strong adhesive qualities ideal for creating a long-lasting waterproof barrier.
- Butyl Tape – Provides a reliable, removable seal, especially useful when adjusting lighting automation or replacing fixtures.
Using these materials helps prevent water intrusion, protects your electrical components, and maintains the integrity of your pool’s structure. Always choose products rated for underwater use and compatible with your lighting system. Proper waterproofing techniques are crucial for ensuring the longevity of your pool’s electrical components and maintaining a safe swimming environment. Additionally, selecting sealants with water-resistant properties ensures the durability of your waterproofing efforts over time.
2-Pack Boss 802 Clear Pro Grade Silicone Sealant for Pool, spa, Household – 2 x 280ML. Tubes
High-Quality Silicone Sealant: Seal and protect your pool, spa, and household surfaces with this professional-grade silicone sealant from…
As an affiliate, we earn on qualifying purchases.
As an affiliate, we earn on qualifying purchases.
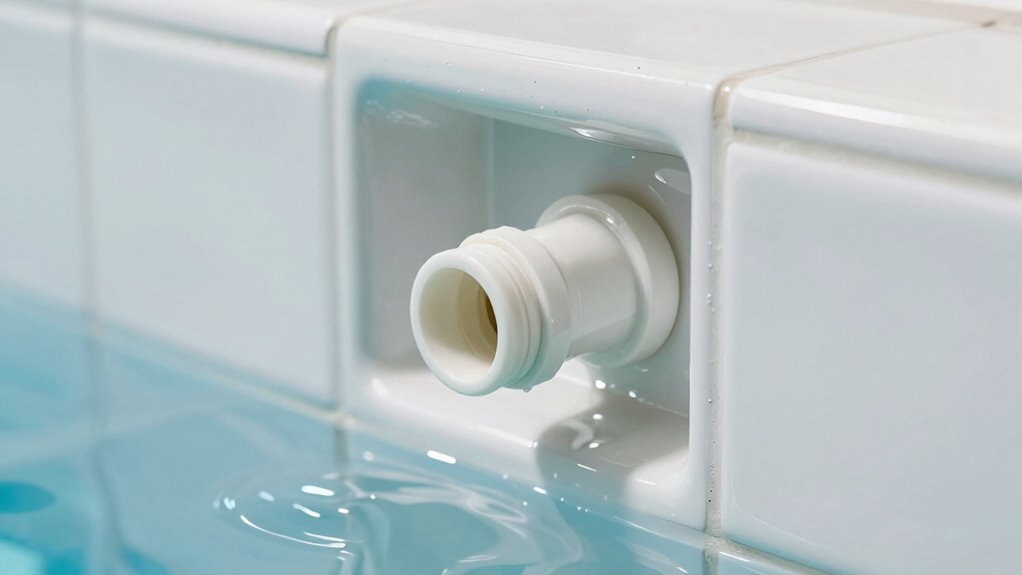
How to Waterproof and Seal Your Pool Light Niche Step-by-Step
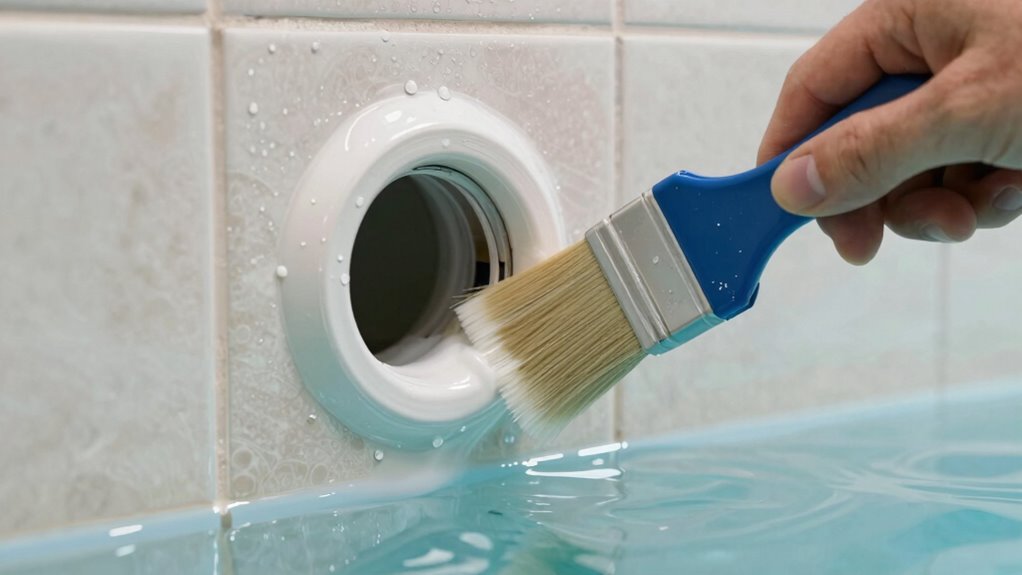
To properly waterproof and seal your pool light niche, you need to start by preparing the area thoroughly. Next, apply a high-quality waterproof sealant evenly around the niche to ensure a tight seal. It’s important to also consider wiring safety practices to prevent potential electrical hazards caused by water infiltration. Additionally, inspecting the halal materials used in any repair components can ensure safety and compliance with standards. Using the right cabling solutions can help maintain long-term waterproofing and prevent future leaks. Finally, test for leaks to confirm your work is effective before closing everything up completely.
Prepare the Niche
Before sealing your pool light niche, make certain the area is clean and dry. Proper niche preparation is essential for effective waterproofing techniques. Start by removing any debris, algae, or old sealant that could compromise the seal. Next, inspect the niche for cracks or damage that might need repair before proceeding. Finally, wipe the area with a clean, damp cloth to guarantee no dust or residue remains. Visualize these steps:
- Clearing out dirt and old sealant
- Repairing any cracks or chips
- Wiping the surface clean and dry
This careful prep creates a solid foundation for waterproofing. Taking your time now guarantees your sealant will adhere properly, preventing leaks and prolonging the life of your pool light niche. Proper niche preparation is key to a successful, leak-free seal.
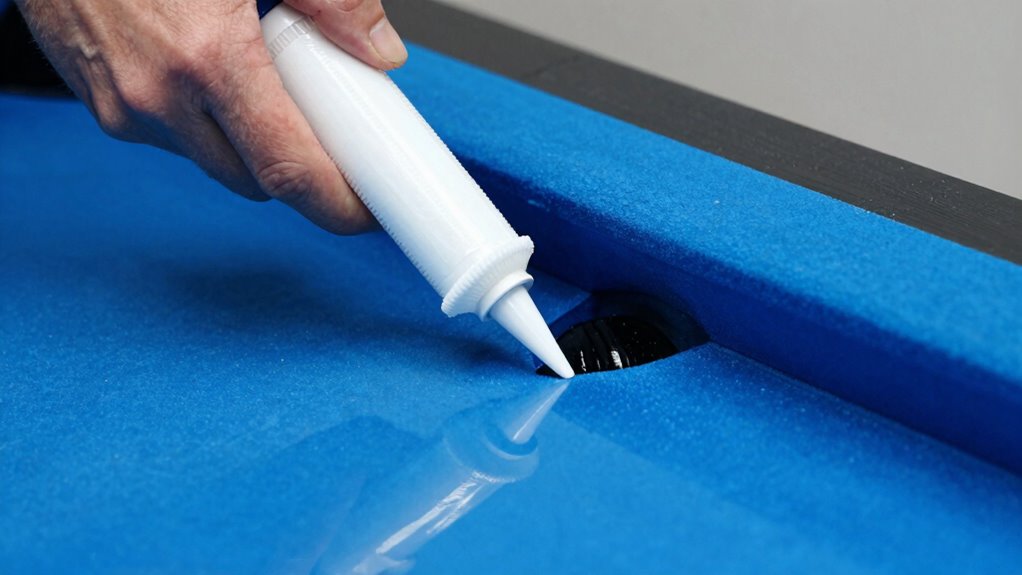
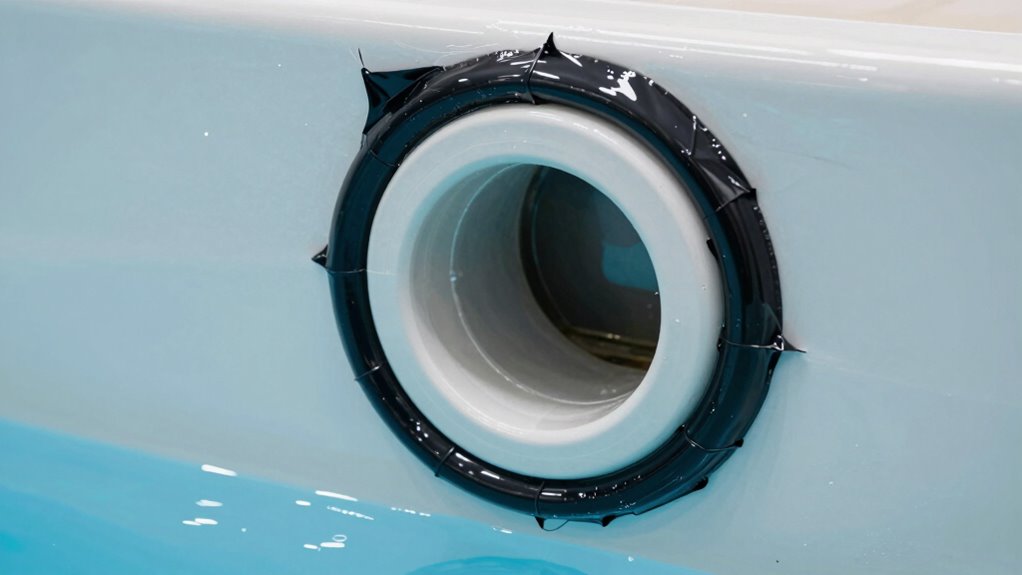
Apply Waterproof Sealant
Applying waterproof sealant is a crucial step in guaranteeing your pool light niche stays leak-free. Begin by selecting a sealant that matches your pool’s color for a seamless look. Carefully apply the sealant around the entire perimeter of the penetration, ensuring complete coverage of all gaps and joints. Use a caulking gun for precision, and smooth out the sealant with a tool or your finger to eliminate air bubbles. Allow the sealant to cure fully, following the manufacturer’s instructions, which typically involves avoiding water contact during this period. Proper color matching helps maintain aesthetic consistency, while thorough curing ensures the sealant adheres properly, providing a durable, waterproof barrier that prevents leaks over time.
Test for Leaks
Wondering if your pool light niche is properly sealed? It’s essential to test for leaks after your pool light installation to prevent water damage. To do this, follow these steps:
- Fill the pool slightly above the niche, ensuring water covers the niche’s exterior.
- Observe the niche area for at least 30 minutes, watching for any signs of water seepage or drops.
- Use a dry cloth or paper towel around the niche to detect moisture or leaks visually.
This process confirms your niche design and waterproof sealant are effective. Properly sealed penetrations prevent water from entering, which can compromise the safety and longevity of your pool light installation. Always double-check your work before finalizing the pool’s fill.
Common Mistakes to Avoid When Sealing Pool Light Niches
Sealing pool light niches correctly is essential to prevent water leaks and guarantee safety, but common mistakes can compromise the job. One mistake is rushing the sealing process, which can lead to gaps that cause leaks and compromise electrical safety. Never skip thorough cleaning and preparation of the niche surface, as dirt or debris can weaken the seal. Using the wrong sealant or applying it unevenly can also create vulnerabilities. Be mindful of aesthetic considerations; a poorly applied sealant can look unprofessional and detract from your pool’s appearance. Additionally, neglecting to check the integrity of the seal after installation might leave small leaks unnoticed. Avoid these mistakes to ensure a watertight, safe, and visually appealing seal that lasts.
Maintenance Tips to Keep Your Pool Light Niche Leak-Free Long Term
Maintaining your pool light niche over time is key to preventing leaks and ensuring safe operation. Regular inspection helps catch issues before they become costly. Here are three essential maintenance tips:
Regularly inspect and maintain your pool light niche to prevent leaks and ensure safety.
- Check the sealant: Look for cracks or deterioration around the niche, and reapply waterproof sealant if needed to maintain pool safety.
- Inspect the gasket: Ensure the gasket is intact and snug; a worn gasket can lead to leaks, compromising equipment maintenance and pool safety.
- Test the light: Periodically turn on the light to verify proper operation and detect any signs of moisture or corrosion early.
Consistent upkeep keeps your pool safe, extends equipment life, and prevents unnecessary water loss. Staying proactive guarantees your pool remains leak-free long term.
When Should You Call a Professional for Pool Light Niche Repairs?

Knowing when to call a professional for pool light niche repairs is essential to prevent further damage and guarantee safety. If your DIY repairs haven’t stopped leaks or if you notice water seeping into the niche, it’s time to seek expert help. Attempting complex repairs without proper skills can lead to bigger issues, like electrical hazards or structural damage. Also, consider the cost considerations—while DIY fixes may seem more affordable initially, they can end up costing more if they fail and cause additional damage. Professional repairs ensure proper waterproofing and compliance with safety standards. If you’re unsure about the extent of the damage or lack experience, it’s best to call in a pool technician to handle the job safely and effectively.
Frequently Asked Questions
Can DIY Waterproofing Fix All Pool Light Niche Leaks?
DIY solutions can sometimes fix minor pool light niche leaks, but they’re not always reliable for long-term waterproofing. If you attempt a DIY fix, you risk incomplete sealing, which could lead to bigger problems later. For best results, consider professional repair, as experts have the right tools and materials to properly waterproof the penetrations. Relying on professional repair guarantees your pool stays leak-free and safe, saving you time and money in the long run.
How Often Should I Inspect My Pool Light Niche for Leaks?
You should inspect your pool light niche at least twice a year, especially before and after swimming season. Think of it as a safety inspection you’d do on your car—preventative and essential. Regular pool maintenance includes checking for leaks, corrosion, or damage to avoid costly repairs. Stay vigilant to keep your pool safe, functional, and enjoyable, ensuring that water stays where it belongs and your lighting works perfectly.
Are There Specific Sealants Recommended for Saltwater Pools?
Yes, you should use saltwater-specific products when sealing your pool light niche. Look for sealants compatible with saltwater environments, as they resist corrosion and salt buildup. Brands like 3M Marine Sealant or Sikaflex offer saltwater-specific products that guarantee a watertight seal. Always check the manufacturer’s recommendations for sealant compatibility to prevent leaks and prolong the lifespan of your pool light niche.
What Signs Indicate My Pool Light Niche Needs Urgent Repair?
If you notice water around your pool light niche, or see corrosion or damage to the niche, it’s time for urgent repairs. Pool light corrosion weakens the seal, risking leaks, while niche damage can cause water infiltration and electrical hazards. Don’t ignore these signs—promptly inspect and waterproof the penetrations to prevent further damage. Addressing issues early keeps your pool safe, functional, and prevents costly repairs down the line.
How Long Does Waterproofing a Pool Light Niche Typically Last?
Ever wonder how long your pool light waterproofing will last before trouble strikes? Typically, proper waterproofing can endure 5 to 10 years, depending on quality and maintenance. If you notice leaks or fogging, it’s a sign your waterproofing’s durability is waning. Regular inspections help catch issues early, ensuring your pool light’s longevity. Don’t wait for a leak—stay proactive to keep your pool safe and sparkling!
Conclusion
To keep your pool safe and sparkling, never ignore signs of leaks in your light niche. Proper waterproofing isn’t just a task — it’s the shield that protects your pool’s integrity. Think of it as your pool’s armor, guarding against unseen damage. Regular checks and timely repairs ensure your pool remains a sanctuary, not a sinking ship. After all, isn’t peace of mind worth a little effort to keep your oasis shining bright?