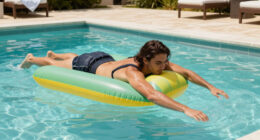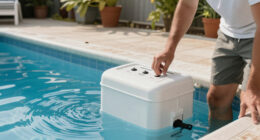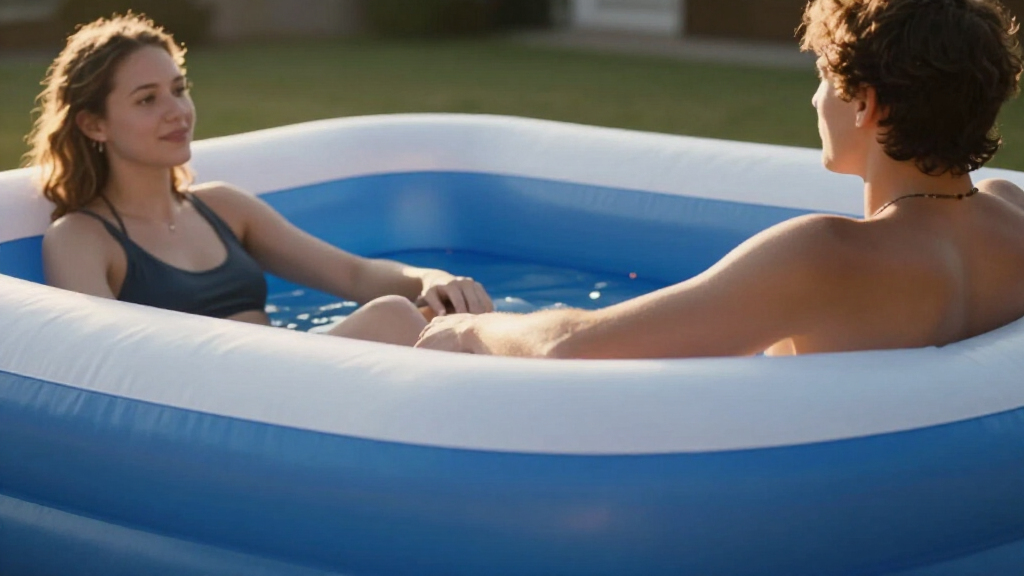

This guide walks you through the complete process of getting an adult-sized inflatable pool float ready for the water: choosing the right float for your body size and pool, inflating it correctly, using it safely, and storing it so it lasts more than one season. It is written for beginners — no pool equipment or repair experience is required. Whether you have a single-ring float, a lounger with a backrest, or a large novelty float, the same basic steps apply. By the end, you will have a fully inflated float that holds air, supports your weight, and is ready for the water.

Get pool and patio gear delivered free — and shop member deals
- Fast, free delivery on millions of items
- Access to Prime Big Deal Days deals on October 6–7
- Prime Video, Amazon Music and more included

Aqua Leisure 4-in-1 Monterey Water Hammock Pool Float, 2-Pack
- ✔ Brand: Aqua Leisure
- ✔ Design: 4-in-1 convertible
- ✔ Pack quantity: 2 floats

SLOOSH Inflatable Pool Lounge Chairs for Adults, 2-Pack
- ✔ Quantity: 2 chairs
- ✔ Dimensions: 30 x 16 x 25 inches each
- ✔ Seat: Breathable mesh sling
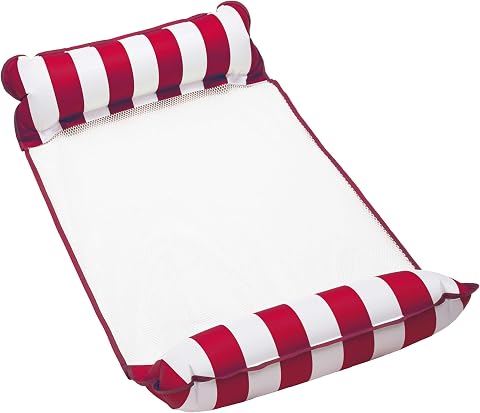
Aqua 4-in-1 Monterey Hammock Pool Float
- ✔ Brand: Aqua Leisure
- ✔ Model: AZL17000
- ✔ Type: 4-in-1 inflatable hammock float
Difficulty: Beginner | Time: 20-40 minutes for setup; 15 minutes for cleaning and storage
What You’ll Need
Tools & Materials:
- An inflatable pool float rated for adult weight (check the listed weight capacity)
- An air pump: manual hand pump, foot pump, or electric pump (hair dryers and leaf blowers without a low setting are not suitable)
- Access to a pool, lake, or calm water area
- A clean, flat surface for inflation, free of rocks, sticks, and debris
- A soft cloth or towel and mild soap for cleaning
- Optional: patch kit sized for your float’s material (vinyl or PVC)
- Optional: storage bag or container and a cool, dry storage spot
Knowledge:
- How to read a product weight capacity label
- Basic understanding that inflatable floats are comfort items, not life-saving devices
Before you start, check the float’s packaging or listing for two numbers: maximum weight capacity and recommended user height. Adult floats commonly support 200-250 lbs, but larger models support more. Never exceed the stated capacity — the float will sit low in the water and may not hold air reliably. Also confirm which valve type your float uses (most use a Boston valve, pinch valve, or screw valve) because this determines which pump nozzle you need.
Aqua Leisure 4-in-1 Monterey Water Hammock Pool Float, 2-Pack
This two-pack is the pick we point most adults toward first, and the reason comes down to versatility per dollar. Each float converts between four positions — saddle, chair, hammock, and drifting platform — which means one purchase covers everything from active pool games to lazy afternoon naps. The soft vinyl and mesh construction keeps you partially submerged and cool, a genuine advantage on hot days when fully inflatable rafts leave you sweating on top of hot plastic.Compared with the SLOOSH lounge chairs, the Monterey offers far more positional freedom, though it sacrifices the structured back support that a fabric-covered chair provides. Compared with the single-unit Aqua Monterey (our Best for Solo Floaters pick), this version simply doubles the value: you get the identical 44 x 26 inch design, the same 250-pound weight capacity, and thicker PVC than typical hammock floats, in a two-pack. The tradeoffs are real — each float holds only one person, and users outside the recommended 4-to-6-foot height range may find the ergonomics awkward. But for couples or households that share a pool, this is the most complete package in the lineup.
Pros:
- Four positions per float: saddle, chair, hammock, and drifting platform
- Works in pools, lakes, and oceans for versatile use
- Thicker PVC construction than typical hammock pool floats
- Two floats included, so nobody has to take turns
Cons:
- Each float accommodates only one person
- Recommended for users between 4 and 6 feet tall
Best for: Couples and families who want maximum floating versatility and two floats in one purchase
Not ideal for: Anyone who wants structured, upright back support or a float taller or shorter than the 4-to-6-foot recommendation
Bottom line: The most versatile and complete package here — four floating positions, a solid 250-pound rating, and two floats in the box make it our best overall pick.
“The most versatile and complete package here — four floating positions, a solid 250-pound rating, and two floats in the box make it our best overall pick.”
SLOOSH Inflatable Pool Lounge Chairs for Adults, 2-Pack
The SLOOSH chairs take a fundamentally different approach to floating than either Monterey option. Instead of lying semi-submerged, you sit in a breathable mesh sling seat with fabric-covered air tubes around you — a design built for stability and an easy climb aboard from deep water. That entry advantage matters more than most buyers realize: hammock floats can require some awkward wrangling to mount, while a chair-shaped float is far more forgiving.Where this option falls short of the Aqua Leisure 2-Pack is versatility. You get one seating position, not four, and the upright posture means more of you stays dry — great for socializing with a drink, less appealing if your goal is full-body cooling. Our bigger hesitation is the absent weight capacity rating; the Monterey floats clearly state a 250-pound limit, and we prefer that transparency when recommending floats for adults of all sizes. On the practical side, the chairs fold compactly when deflated, making them the easiest option here to toss in a beach bag, and the two-pack format matches our top pick for shared use across pools, beaches, and lakes.
Pros:
- Mesh sling seat allows water to flow through for cooling comfort
- Designed for stability and easy entry from the water
- Two chairs included for shared floating
- Folds compactly for storage and travel
Cons:
- Requires inflation before each use
- No weight capacity is specified
Best for: Adults who want to sit upright, stay partly dry, and chat or hold a drink while floating
Not ideal for: Buyers who need a stated weight capacity or want the multi-position versatility of a hammock float
Bottom line: The most social, easiest-to-board float in this lineup, best suited to upright lounging — just note the missing weight rating before buying.
“The most social, easiest-to-board float in this lineup, best suited to upright lounging — just note the missing weight rating before buying.”
Aqua 4-in-1 Monterey Hammock Pool Float
This single-unit Monterey is essentially the same float as our top pick — same 44 x 26 inch footprint, same 50/50 vinyl-and-mesh build, same 250-pound capacity, same four positions. At just 14.8 ounces, it is also the lightest option in this roundup, which makes it the one we would grab for a solo trip to the lake or a vacation where packing space is tight.So why does it rank third rather than first? Purely because of value logic: if two people will ever float at once, the 2-Pack makes more sense than buying this twice. But if you live alone, or your household rarely overlaps at the pool, this single float avoids paying for redundancy. Compared with the SLOOSH chairs, it offers dramatically more positional freedom, and its seat-in-the-water design makes it notably easy to get on and off. The caveats mirror the 2-Pack — the 4-to-6-foot height recommendation excludes some adults, and packaging and colors may vary, which matters if you have your heart set on a specific look.
Pros:
- Four positions: saddle, chair, hammock, or drifter
- Seat rests in the water, making it easy to get on and off
- At under one pound, it is highly portable
- Supports up to 250 pounds
Cons:
- Recommended for people 4 to 6 feet tall
- Packaging and colors may vary
Best for: Solo floaters and travelers who want one versatile, ultralight float for pool, lake, or ocean
Not ideal for: Households where two people will float simultaneously — the 2-Pack is the better buy
Bottom line: The smart single-float choice — identical versatility to our top pick in a lighter, one-person package that suits solo and travel use.
“The smart single-float choice — identical versatility to our top pick in a lighter, one-person package that suits solo and travel use.”
As an Amazon Associate we earn from qualifying purchases.
Before You Start
Safety first: An inflatable pool float is not a life jacket or rescue device. Do not rely on one to stay afloat if you cannot swim, and do not use adult floats as supervision substitutes for children. Always use floats in water you can safely exit, avoid deep water alone, and stay clear of pool drains, skimmers, and drop-offs. Check local rules — many public pools prohibit large novelty floats. Finally, never over-inflate: floats expand slightly in sun and heat, and over-inflation is the leading cause of seam failure.
Step-by-Step Instructions
Step 1: Inspect the float before inflating
Unfold the float on a clean, flat surface away from sharp objects. Spread it out fully and examine both sides for punctures, cracked seams, or manufacturing defects. Run your fingers along the seams to feel for splits. Open and close every valve to confirm each one moves freely and is undamaged.
Tip: Do the inflation and inspection on grass, a towel, or a deck — never on concrete with loose grit, which can scratch and weaken the material over time.
Check: No visible holes, tears, or separated seams, and every valve closes and opens freely.
Step 2: Match your pump nozzle to the valve
Identify your float’s valve type, then select the pump nozzle that fits snugly inside it. Unscrew the top cap of a Boston valve (two-piece screw valve) and insert the nozzle directly into the valve body. Push the nozzle of a pinch valve in past the one-way flap and hold it firmly in place.
Tip: A loose nozzle fit wastes most of your pumping effort. If air hisses out around the nozzle, wrap one layer of tape around the nozzle tip to thicken it slightly.
Check: The nozzle stays seated in the valve without being held, or with only light pressure.
Step 3: Inflate the main chamber to about 90 percent
Start pumping, or switch on your electric pump at a low-to-medium setting. Fill the main air chamber until the float holds its shape and feels firm but still yields slightly when you press hard with your thumb. Stop short of full firmness — leave roughly 10 percent give.
Tip: If inflating in direct sun or hot weather, under-inflate slightly more. Air expands with heat, and a float that was rock-hard in the shade can split a seam in full afternoon sun.
Check: The float holds its shape, springs back when pressed, but still flexes slightly under firm thumb pressure.
Step 4: Inflate any secondary chambers
Inflate each additional air chamber — backrests, armrests, headrests — one at a time, following the numbered or labeled order in the instructions if provided. Fill each chamber to the same 90 percent level. Close each valve tightly before moving on to the next chamber.
Tip: Multi-chamber floats are inflated in a specific order because later chambers add pressure against earlier ones. Skipping the order can twist the float’s shape or strain the internal baffles.
Check: All chambers are firm, the float sits flat and symmetrical, and no chamber bulges oddly or collapses when you press a neighboring one.
Step 5: Close and test the valves
Replace valve caps, push pinch valves closed, or screw Boston valve tops back on firmly. Squeeze the inflated float with both hands and listen and feel for escaping air around each valve. Submerge just the valve area in a basin of water and watch for bubbles — this is the most reliable check.
Tip: If you see bubbles at a valve, the cap is usually just cross-threaded or the valve seat has grit on it. Remove it, wipe the seat clean, and reseal it before assuming there is a defect.
Check: No hissing sound and no bubble stream from any valve when the float is compressed.
Step 6: Do a 15-minute air-hold test
Set the inflated float aside in the shade for 15 minutes, then press it again with your thumb. Expect a small loss of firmness in the first hour as the air settles — but act if the float goes visibly soft or wrinkled.
Tip: This quick test before your first use is much easier than discovering a slow leak when you are already in the water. If it softens noticeably, see the troubleshooting section below.
Check: After 15 minutes, the float is still firm and holds its shape under its own structure.
Step 7: Enter the water with the float correctly
Carry the float to the pool edge or shallow water. Sit down on the pool steps or stand in shallow water first, then ease yourself onto the float, keeping your weight centered. Position your body across the float the way the design intends: lie along loungers, sit centered in saddles and tubes, and keep arms and legs inside the intended supports.
Tip: Never jump or dive onto an inflatable float. Landing off-center is the fastest way to tear a seam, and landing on top of a float in shallow water risks injury.
Check: The float supports you at the waterline described in the product photos — typically sitting with its top surface just above the water, not submerged.
Step 8: Use the float safely in the water
Stay within the pool area you can comfortably exit. Keep away from skimmers, ladders, and drain covers. Reposition yourself slowly to avoid tipping, and avoid standing on large novelty floats. Exit the water by paddling or walking to the shallow end or pool edge before standing up off the float.
Tip: Long floats drift. In a pool, note which way the return jet pushes you so you are not pinned against a wall or skimmer.
Check: You can maneuver, relax, and exit the water without tipping or scraping the float against pool hardware.
Step 9: Clean and dry the float after each use
Rinse the float with clean water to remove chlorine, sunscreen, and body oils. Wipe it with a cloth and mild soapy water if it is visibly dirty. Spread it in the shade to dry completely before storage — trapped moisture causes mold and material breakdown.
Tip: Never dry an inflatable in direct sun. UV exposure is the main reason floats become sticky and brittle after one season.
Check: The float is completely dry to the touch on both sides, including inside crevices around valves and handles.
Step 10: Deflate and store the float properly
Open all valves and press the float flat to expel air, working from the far end toward each valve. Fold the float loosely — do not crease it sharply. Place it in a storage bag or container in a cool, dry spot indoors, away from sunlight, heat sources, and anything sharp.
Tip: Store the float with the valves closed after folding so insects and dust cannot get inside the chambers.
Check: The folded float fits compactly in its bag with no air pockets, and shows no crease marks or stickiness when you next unfold it.
Common Mistakes to Avoid
- Over-inflating the float to rock hardness — Stop at 90 percent firmness. The float should still flex under firm thumb pressure, especially in hot weather, because air expands in the sun and excess pressure splits seams.
- Inflating on concrete, gravel, or a dirty deck — Always unfold and inflate on grass, a towel, or a clean tarp. Tiny grit pressed into the vinyl during inflation creates weak points that become slow leaks.
- Using a high-pressure air compressor or hair dryer — Use a pump made for inflatables with a low-pressure output. Compressors fill inflatables in seconds and routinely blow out seams; hair dryers overheat the vinyl.
- Storing the float damp or folded tightly in a hot shed or car trunk — Dry both sides completely in the shade, fold loosely, and store indoors at room temperature. Moisture grows mold and heat degrades the material.
Troubleshooting
Problem: The float goes soft within an hour of inflation
Solution: Re-check all valve caps first — a loose or cross-threaded cap is the most common cause. If valves are tight, submerge sections of the inflated float in water and watch for a bubble stream to locate a puncture. Mark the spot with tape or a grease pencil, dry the area, and apply a patch from a vinyl repair kit, following the kit’s cure time before re-inflating.
Problem: Air escapes from around the pump nozzle during inflation
Solution: The nozzle is too small for the valve. Wrap one or two layers of tape around the nozzle tip until it fits snugly, or switch to the next size up in your pump’s nozzle set. For pinch valves, make sure you have pushed the nozzle past the internal flap.
Problem: A multi-chamber float inflates crooked or twisted
Solution: Deflate all chambers completely, smooth the float flat, and re-inflate in the manufacturer’s labeled chamber order, stopping each chamber at 90 percent. If one chamber bulges into another, that chamber is over-inflated — release some air until the float sits symmetrical.
Problem: The float sits very low in the water with an adult on it
Solution: The float is under-inflated or its weight capacity is below the user’s weight. Confirm the rated capacity on the label, top off air to 90 percent firmness, and if the user still exceeds the rating, switch to a heavy-duty adult float rated for the correct weight.
What Success Looks Like
Your setup is successful when the float inflates to a firm-but-flexible state in 90 percent time, holds its shape for at least 15 minutes without softening, shows no air leaks at any valve when compressed or bubble-tested, and supports the intended user at a comfortable waterline without submerging or tipping. After use, success looks like a clean, fully dried float stored loosely folded in a cool indoor space, ready to inflate again in minutes for the next swim.
Next Steps
Repeat the rinse, dry, and fold routine after every use to get multiple seasons from one float. Keep a vinyl patch kit with your pool supplies so a puncture never ends a pool day — patch small holes at the first sign of a slow leak rather than waiting for them to grow. If you use floats frequently, an inexpensive electric inflatable pump pays for itself quickly compared to manual pumping. When a float develops multiple seam leaks or the material feels sticky and brittle, replace it rather than patching it; degraded vinyl fails unpredictably in the water. Finally, review pool safety basics each season, especially if children or weak swimmers will be near the water where adults are floating.
Frequently Asked Questions
Can I inflate a pool float with my mouth?
How firm should an inflatable pool float be?
What weight capacity do I need in an adult float?
How do I find and fix a slow leak?
How long do inflatable pool floats last?
Fall Picks
fall essentials
As an affiliate, we earn on qualifying purchases.