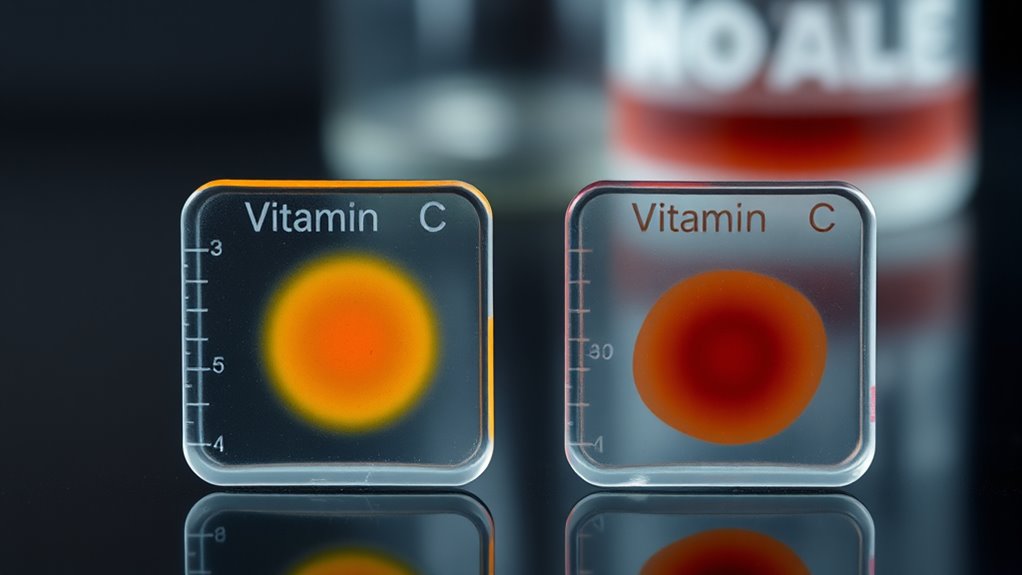

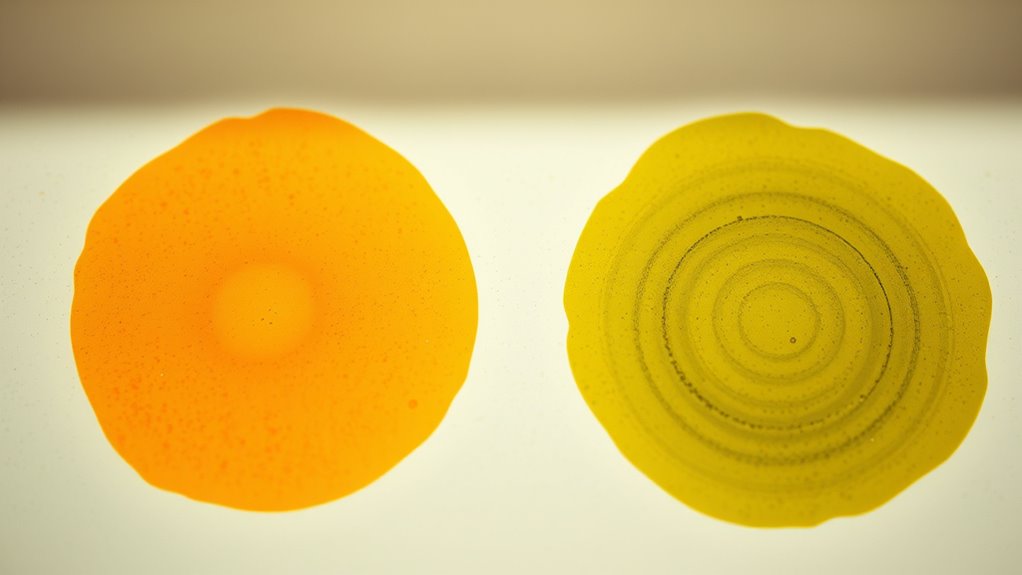
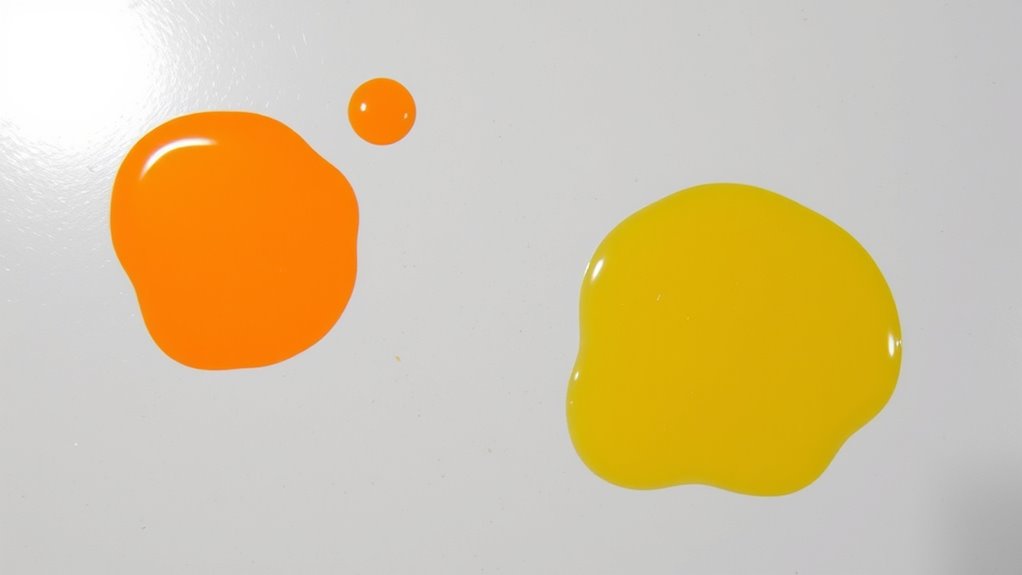
To tell vitamin C stains apart from sequestering agent residues, perform a spot test by applying a reagent directly to the stain’s edge. Vitamin C stains usually show a faint, translucent yellowish color change, while sequestering agents tend to result in dull, faded, and less translucent spots. Recognizing these differences helps you identify the stain type accurately and choose the right cleaning method. Further details on the exact test outcomes and solutions await you.
Key Takeaways
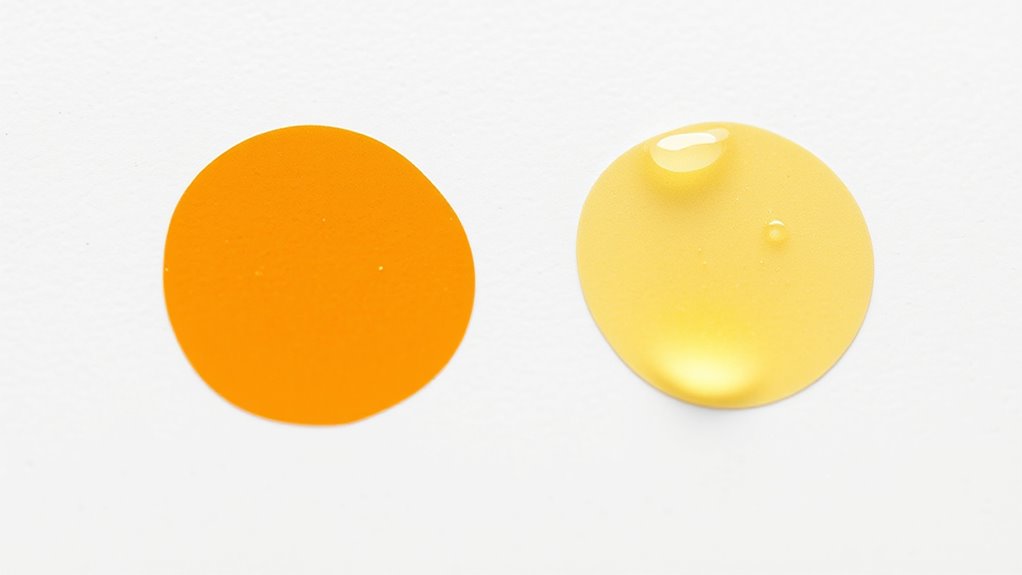
- Vitamin C stains appear as faint, translucent, yellowish marks that become more visible after washing or heat.
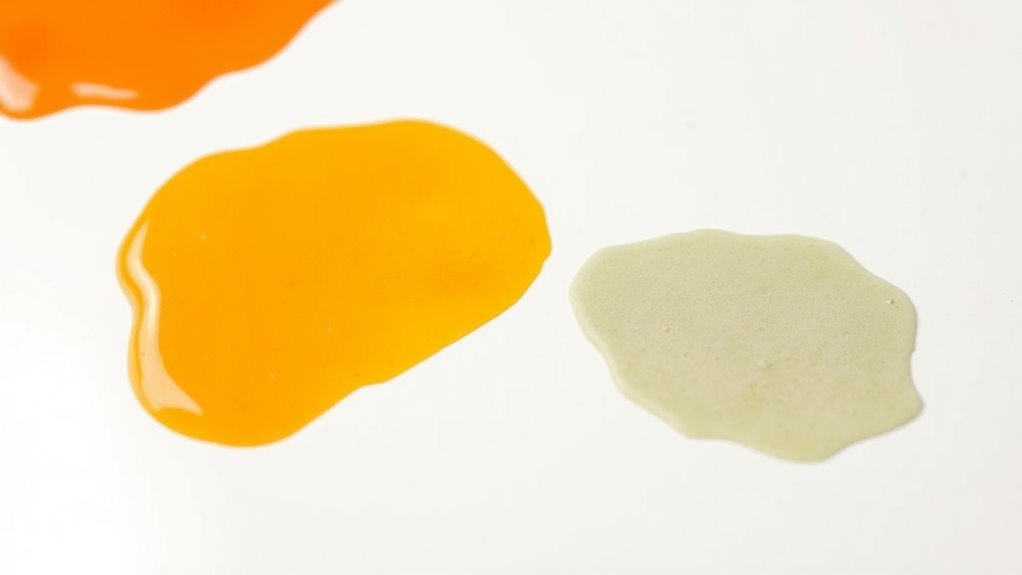
- Sequestering agent stains are dull, water-soluble spots with a faint film, less translucent than Vitamin C stains.
- Spot tests for Vitamin C often show minimal or no color change, indicating subtle, translucent stains.
- Sequestering agent stains may produce a faint color change or film reaction, helping differentiate from Vitamin C.
- Recognizing stain traits and test reactions guides appropriate cleaning methods for each stain type.

Bosh Chemical Vanish Pool & Spa Stain Remover 2 Pack (4LBS)- Natural Safe Citrus Based, Works Excellent on Vinyl, Fiberglass, and Metals, Removes Rust and Other Tough Stains
FAST EASY and SAFE USE–Naturally remove stains from pool linings and underwater surfaces without scrubbing. Completely safe for…
As an affiliate, we earn on qualifying purchases.
As an affiliate, we earn on qualifying purchases.
Understanding the Spot Test Process
To effectively identify stains, you need to understand the spot test process. This involves applying a small amount of a specific reagent directly to the stain and observing the color change. You want to choose the right test based on the suspected substance, as different chemicals react uniquely. Before testing, make sure the fabric is clean and dry. Use a cotton swab or dropper to carefully place the reagent onto the stain’s edge, avoiding surrounding areas. Wait a few seconds to allow the chemical reaction to occur, then compare the color change to a reference chart. This quick step helps you gather essential clues about the stain’s composition without damaging the fabric, guiding your next cleaning move.

Diamond Magic – Water Spot & Multi-Purpose Cleaner (20 Ounces) Clean with The Power of Genuine Diamonds! Professional Cleaner/Hard Water Stain Remover. Made in The USA!
Professional hard water stain remover & multi-purpose cleaner, made with genuine diamonds! Trusted and used by professionals across…
As an affiliate, we earn on qualifying purchases.
As an affiliate, we earn on qualifying purchases.
Recognizing Vitamin C Stains and Their Characteristics
Have you ever noticed a faint, yellowish or translucent stain on your fabric after handling vitamin C-rich foods or supplements? These stains are often subtle and may not be immediately obvious. Vitamin C stains typically appear as light, almost clear marks with a slight yellow tint, especially on white or light-colored fabrics. They tend to be more translucent than other stains, making them tricky to spot at first glance. The stain’s edges are usually soft and diffuse, blending gradually into the fabric. You might notice the stain becomes more prominent after washing or when exposed to heat. Recognizing these characteristics helps you distinguish vitamin C stains from other types, ensuring you take the right steps to treat them effectively. Additionally, understanding the stain composition can aid in selecting the most effective cleaning method.

Bleachstain® Precision Carpet Spot Dye Kit | Bleach Stain Repair Kit | For Spots And Drips Smaller Than Pea Size | For medium beige, gray, tan
Bleachstain is proud to present the oldest patented carpet spot dye kit in the industry. The initial step…
As an affiliate, we earn on qualifying purchases.
As an affiliate, we earn on qualifying purchases.
Identifying Sequestering Agent Stains and Their Traits
Ever wonder how to recognize stains caused by sequestering agents? These stains often look different from vitamin C marks. They tend to be dull, water-soluble, and may leave a faint film. Sequestering agent stains usually appear as light, faded spots that don’t change color easily. They can sometimes be mistaken for other residues, so knowing their traits helps. Understanding Gold IRA Rollovers can also be useful when managing investment-related stains or residues in specialized environments.
Stain Identification Kit
Quickly and precisely determines the appropriate products to remove stains
As an affiliate, we earn on qualifying purchases.
As an affiliate, we earn on qualifying purchases.
Interpreting Spot Test Results Effectively
When interpreting spot test results, you should focus on recognizing clear color changes that indicate different stains. It is crucial to observe the consistency of results across multiple tests to ensure accuracy. Comparing your findings to known standards helps confirm your identification and avoid misinterpretation. Employing data-driven strategies can also enhance the reliability of your interpretations by providing measurable benchmarks.
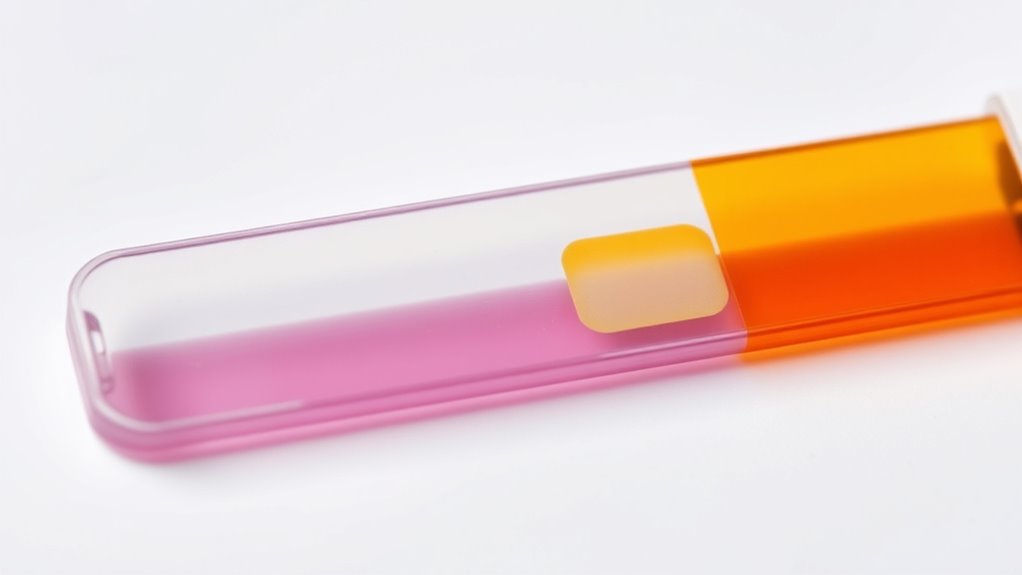
Recognize Color Changes Clearly
To interpret spot test results accurately, it’s essential to recognize even subtle color changes quickly and confidently. Pay close attention to shifts in hue, brightness, or intensity, as these indicate different stain types. For example, a clear color shift from clear or pale to a vibrant shade suggests a positive result, while minimal or no change often points to a negative. Use a consistent light source to observe the test, as lighting can distort colors. Keep a color reference chart handy if possible, to compare your findings precisely. The key is to train your eye to notice small but meaningful differences without hesitation. Developing this skill ensures you won’t overlook important results, enabling confident and accurate stain identification.
Note Test Consistency
Ensuring test consistency is crucial for accurate stain identification. You need to perform each spot test under similar conditions—using the same amount of sample, reagent, and timing. Keep your lighting consistent, so color changes are easy to interpret. Document each step carefully, noting the exact amount of reagent added and the duration before observing results. Repeat tests if needed to confirm patterns; inconsistent results can lead to misinterpretation. Avoid rushing through the process or changing variables arbitrarily, as this can skew your findings. By maintaining a steady routine, you improve reliability and reduce errors. Consistency allows you to compare results over time, ensuring that your stain identification remains accurate and trustworthy. Additionally, understanding automation in business can help you recognize how technological advancements might impact laboratory workflows and testing procedures.
Compare to Known Standards
How can you accurately interpret spot test results? The key is comparing your results to known standards. First, familiarize yourself with reference colors or patterns associated with specific substances, like vitamin C or sequestering agents. When you perform the test, note the color change precisely and compare it side-by-side with standard color charts or control samples. Avoid guesses; subtle differences matter. If your sample’s color matches a known standard, you can confidently identify the stain. Keep in mind that lighting conditions and the age of the reagents can influence color perception, so perform comparisons in consistent lighting and use fresh standards whenever possible. This method ensures your interpretation is reliable, making your stain identification more accurate and actionable. Additionally, understanding the principles behind glycolic acid and other skincare ingredients can help interpret test results related to skin treatments more effectively.
Practical Tips for Accurate Stain Identification
Accurate stain identification begins with paying close attention to the stain’s appearance and context. Observe its color, shape, size, and location on the fabric. Note any patterns—are the edges sharp or diffuse? Consider recent activities or exposures that might have caused the stain. Take note of whether the stain looks fresh or set, as this influences how it reacts to treatments. Use proper lighting to see all details clearly. When possible, gently test small areas before applying any solutions to avoid spreading or worsening the stain. Keep a record of observations, including any changes after testing. Additionally, understanding the performance of different stain removal methods can help you select the most effective approach. This careful approach helps you gather reliable information, making it easier to identify the stain type and choose the right removal method.
Choosing the Right Cleaning Approach Based on Test Outcomes

Once you interpret the test results, you can choose the most effective cleaning agents for your stain. It’s important to match the right approach to avoid damaging the fabric or surface. Making informed decisions helps guarantee your stain removal is successful and safe. Considering the use of hydrocolloid technology can further enhance stain treatment, especially for stubborn or deep-set spots.
Interpreting Test Results
When you interpret test results, understanding what each outcome indicates is vital for selecting the most effective cleaning method. If the stain lightens or disappears with Vitamin C, it suggests a vitamin C-sensitive stain, like rust or iron. This means you should use a gentle, vitamin C-based approach. If the stain remains unchanged, it indicates the stain isn’t affected by Vitamin C, pointing to other causes like tannins or dyes. Conversely, if sequestering agents cause a noticeable lightening, the stain likely contains metals or minerals. No change with either test suggests a different stain type requiring alternative treatments. Accurate interpretation allows you to tailor your cleaning strategy, avoiding unnecessary or ineffective methods, and ensures you target the stain with the appropriate approach for the best results. Recognizing how contrast ratio influences image quality can also help in selecting the right projector for your space.
Selecting Effective Agents
Choosing the right cleaning agents depends on the test results you’ve interpreted. If the stain reacts to Vitamin C, you’ll want a different approach than if it responds to sequestering agents. For Vitamin C stains, use gentle acids to neutralize the stain without damaging the fabric. For sequestering agent-sensitive stains, employ chelators that bind minerals and loosen the stain’s grip.
| Stain Type | Recommended Agent | Application Tip |
|---|---|---|
| Vitamin C (ascorbic) | Mild acid solutions | Test on a small area first |
| Mineral-based | Chelating agents | Avoid overuse to prevent damage |
| Organic stains | Enzymatic cleaners | Follow manufacturer instructions |
| Oxidized stains | Hydrogen peroxide or bleach | Use cautiously to prevent fabric harm |
| Unknown stains | Gentle, pH-balanced cleaners | Conduct spot test before full application |
Avoiding Damage Risks
To prevent damaging the fabric, always tailor your cleaning approach based on test outcomes. If the test indicates a vitamin C stain, avoid using harsh or alkaline cleaners, as they can weaken fibers or cause discoloration. Instead, opt for gentle, pH-balanced solutions. For sequestering agent stains, steer clear of strong acids or abrasive scrubbing, which might damage delicate fibers. Always perform a spot test on a hidden area first to confirm the cleaner’s safety. Be cautious with high-alkaline or acidic products, as they can cause fabric deterioration or color loss. Using the wrong approach risks permanent damage, so follow the test results carefully. When in doubt, consult manufacturer guidelines or seek professional advice to ensure you choose a safe, effective method. Additionally, understanding the different stain types can help you select the most appropriate cleaning strategy.
Frequently Asked Questions
Can Other Substances Mimic Vitamin C or Sequestering Agent Stains?
Yes, other substances can mimic vitamin C or sequestering agent stains, which can make identification tricky. For example, certain dyes, detergents, or cleaning agents may produce similar color changes during spot tests. To avoid confusion, you should verify your results with additional testing methods or compare samples under different conditions. This way, you guarantee accurate identification, preventing costly mistakes or improper cleaning treatments.
How Long Does a Typical Spot Test Take to Produce Results?
A typical spot test usually takes about 1 to 5 minutes to produce results. You’ll see a color change almost immediately if the substance is a vitamin C or sequestering agent. Be sure to follow the specific instructions for your test kit, as timing can vary slightly depending on the method. Keep an eye on the color shift, and record your results promptly to guarantee accuracy.
Are There Environmental Factors Affecting the Spot Test Accuracy?
Environmental factors can definitely impact your spot test accuracy, like trying to read a map in fog. Humidity, temperature, and light exposure can cause false positives or negatives, so it’s essential to perform tests in stable conditions. Make sure to keep your workspace dry and cool, and avoid direct sunlight. By controlling these factors, you’ll get more reliable results, helping you accurately identify stains and their agents.
What Are the Safety Precautions When Performing Stain Tests?
When performing stain tests, you should always wear gloves and protective eyewear to prevent chemical exposure. Work in a well-ventilated area, and handle reagents carefully to avoid spills. Keep a clean workspace, and follow manufacturer instructions precisely. If any chemicals come into contact with your skin or eyes, rinse immediately with plenty of water. Proper disposal of chemicals is crucial to guarantee safety for yourself and the environment.
Can Repeated Testing Damage the Fabric or Surface?
Repetition is the mother of skill, but it can also harm your fabric or surface. Repeated testing may cause slight wear, fading, or weakening of fibers over time. To avoid damage, limit tests to necessary spots and use gentle methods. Always follow proper procedures and wait between tests, giving the material time to recover. Think of it like tending a garden—too much watering can do more harm than good.
Conclusion
Understanding the spot test can boost your confidence in tackling stains. Did you know that correctly identifying stain types can increase cleaning success rates by up to 85%? Whether it’s vitamin C or sequestering agents, knowing what you’re dealing with helps you choose the right approach. Keep practicing these tests, and you’ll become more efficient at stain removal, saving time and effort. Mastering this skill makes your cleaning routine smarter and more effective.